
Getting started
Set up your FrontFlow site, administrator account, employees, kiosk, and visitor check-in workflow.
Use the FrontFlow Site Dashboard to configure your organization, add employees or providers, secure the kiosk, and test the visitor check-in process.
Before you begin
Have the following ready:
- Your FrontFlow administrator sign-in details and admin-page link
- The company or site name to display at the kiosk
- A short, unique URL name for the site
- The site’s time zone
- A company logo image
- Each employee/provider’s name and photo
- A U.S. mobile number for each employee/provider who will receive visitor-arrival SMS alerts
- Each employee/provider’s express written authorization to receive FrontFlow visitor-arrival SMS alerts
- An optional kiosk unlock code for each iPad or kiosk device
- Any visitor-consent language required by your organization
Important: Employee/provider SMS authorization is separate from visitor consent at the kiosk. Obtain the employee/provider’s express written consent before entering or changing their mobile number. Employees without confirmed consent do not appear on the kiosk and cannot receive arrival alerts.
1. Open the FrontFlow administrator page
- Open the administrator link supplied by FrontFlow.
- Sign in with your administrator account if prompted.
- Confirm that the Site Dashboard appears.
FrontFlow admin addresses normally end in /admin. Use the specific address provided for your organization.
2. Configure the site’s branding
In the Branding section, complete the following fields:
- URL-input: Enter the unique name used in the site’s kiosk URL.
- Example:
mainstreet-1 - Keep this value short and easy to type.
- Example:
- Company name: Enter the organization or location name visitors should see.
- Example:
Main Street Pros
- Example:
- Show company name on the kiosk: Leave this selected if the name should appear next to the logo.
- Site time zone: Choose the site’s local time zone.
- Example: Central Time
- Visitor-arrival SMS messages use this time zone, including daylight-saving changes where applicable.
- Welcome message line 1: Enter the main greeting.
- Example:
Welcome. Who are you here to see?
- Example:
- Welcome message line 2 (optional): Add a second greeting if desired.
- Example:
Bienvenido!
- Example:
- Review the Default consent message. This is the consent text available for employees/providers unless a provider-specific override is entered.
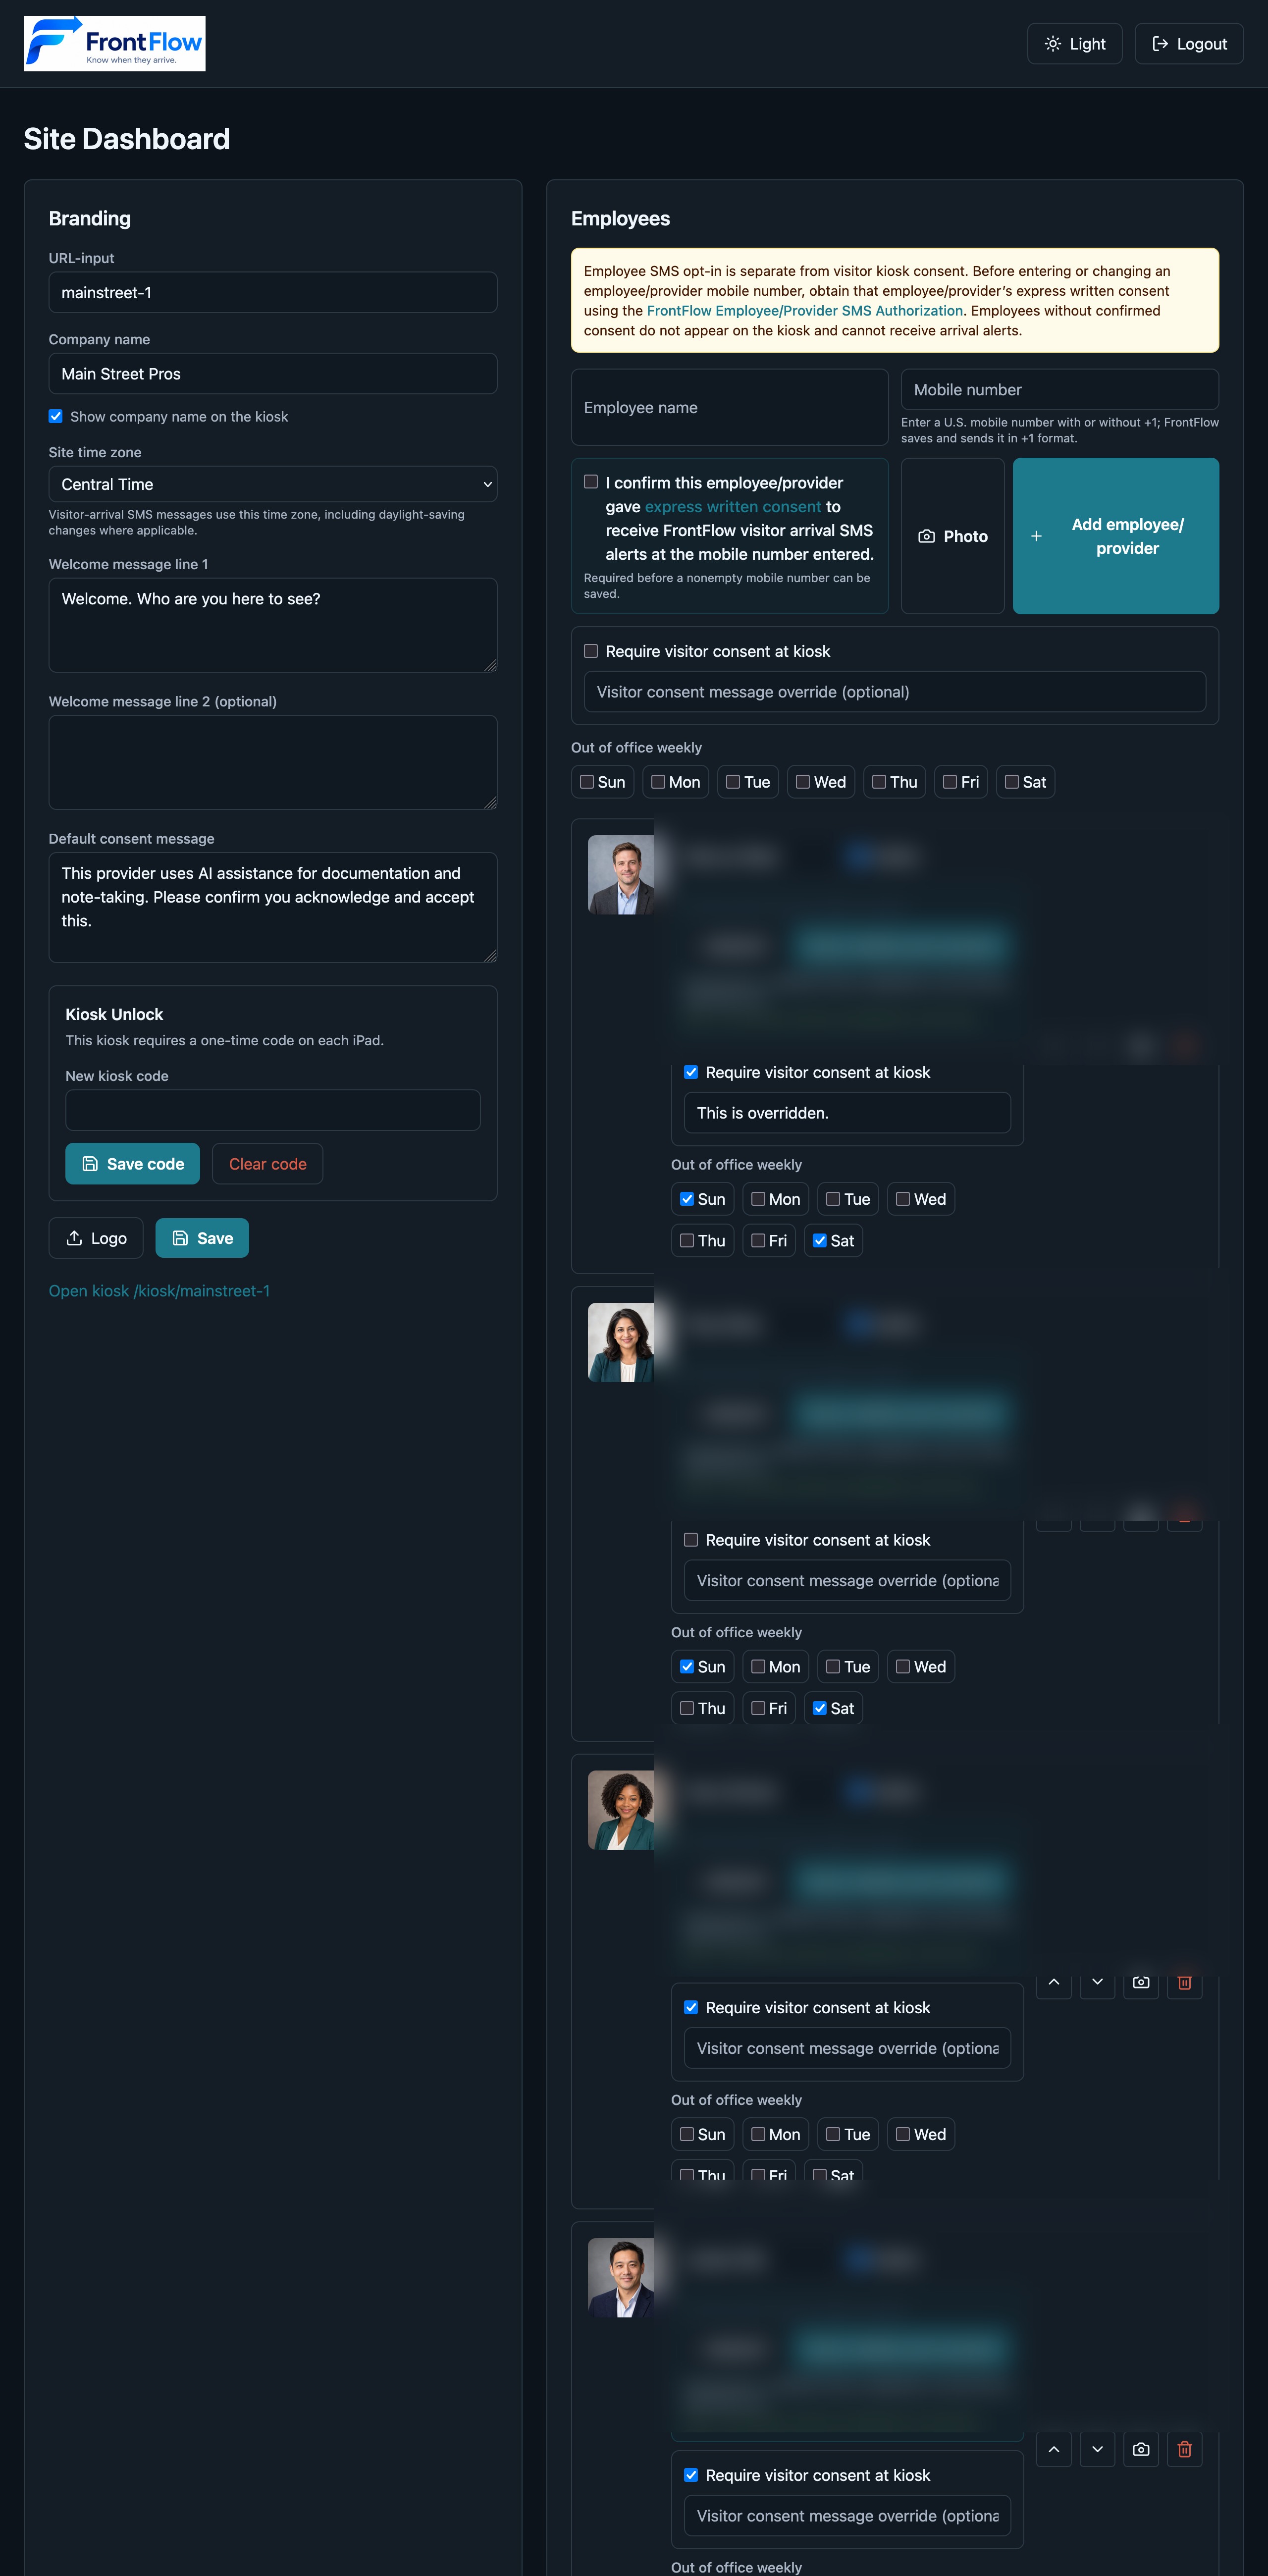
Do not select Save yet if you still need to configure the logo or other branding options below it.
3. Configure kiosk access
The Kiosk Unlock area controls access to the public kiosk URL.
- Decide whether the kiosk should require an unlock code.
- To protect the kiosk, enter a code in New kiosk code.
- Select Save code.
- Confirm that FrontFlow reports that the kiosk unlock code was saved.
When a code is configured, it must be entered once on each iPad or kiosk device to unlock the site. If no code is configured, the kiosk URL is public.
To remove an existing kiosk code later, use Clear code.
4. Upload the company logo and save branding
- Select Logo.
- Choose the company logo image from the file picker.
- Confirm the upload and wait for the Done — Logo uploaded message.
- Select Save in the Branding section.
Tip: Use a clear logo with enough contrast to remain readable on the kiosk’s dark background.
5. Add an employee or provider
In the Employees section:
Enter the person’s name in Employee name.
Enter the person’s U.S. mobile number in Mobile number.
- The number may be entered with or without
+1. - FrontFlow saves and sends the number in
+1format.
- The number may be entered with or without
After obtaining the person’s express written authorization, select the checkbox labeled:
I confirm this employee/provider gave express written consent to receive FrontFlow visitor arrival SMS alerts at the mobile number entered.
Select Photo and choose the employee/provider’s image.
If visitors must explicitly consent at check-in, select Require visitor consent at kiosk.
If this provider needs different consent wording, enter it in Visitor consent message override (optional). Otherwise, FrontFlow uses the default consent message.
Under Out of office weekly, select every weekday on which the employee/provider is normally unavailable.
Select Add employee/provider.
Wait for the confirmation message showing that the employee/provider was added.
Repeat these steps for every employee or provider visitors may select.
6. Review and manage saved employees/providers
After a person is added, review their saved card:
- Confirm the name and photo are correct.
- Ensure Active is selected if the person should appear on the kiosk.
- Verify the mobile number and consent status.
- Check the recorded consent-confirmation timestamp and the opt-in confirmation SMS timestamp.
- Verify Require visitor consent at kiosk, any provider-specific consent override, and the weekly out-of-office days.
The saved card also provides controls to:
- Move the employee/provider up or down in the kiosk display order
- Change the photo using the camera button
- Delete the employee/provider using the trash button
- Update the mobile number and authorization using Save mobile and consent
Changing a mobile number requires the employee/provider’s consent for the new number.
7. Open and verify the kiosk
- In the Branding section, select Open kiosk followed by the displayed kiosk path, such as
/kiosk/mainstreet-1. - Enter the kiosk unlock code if prompted.
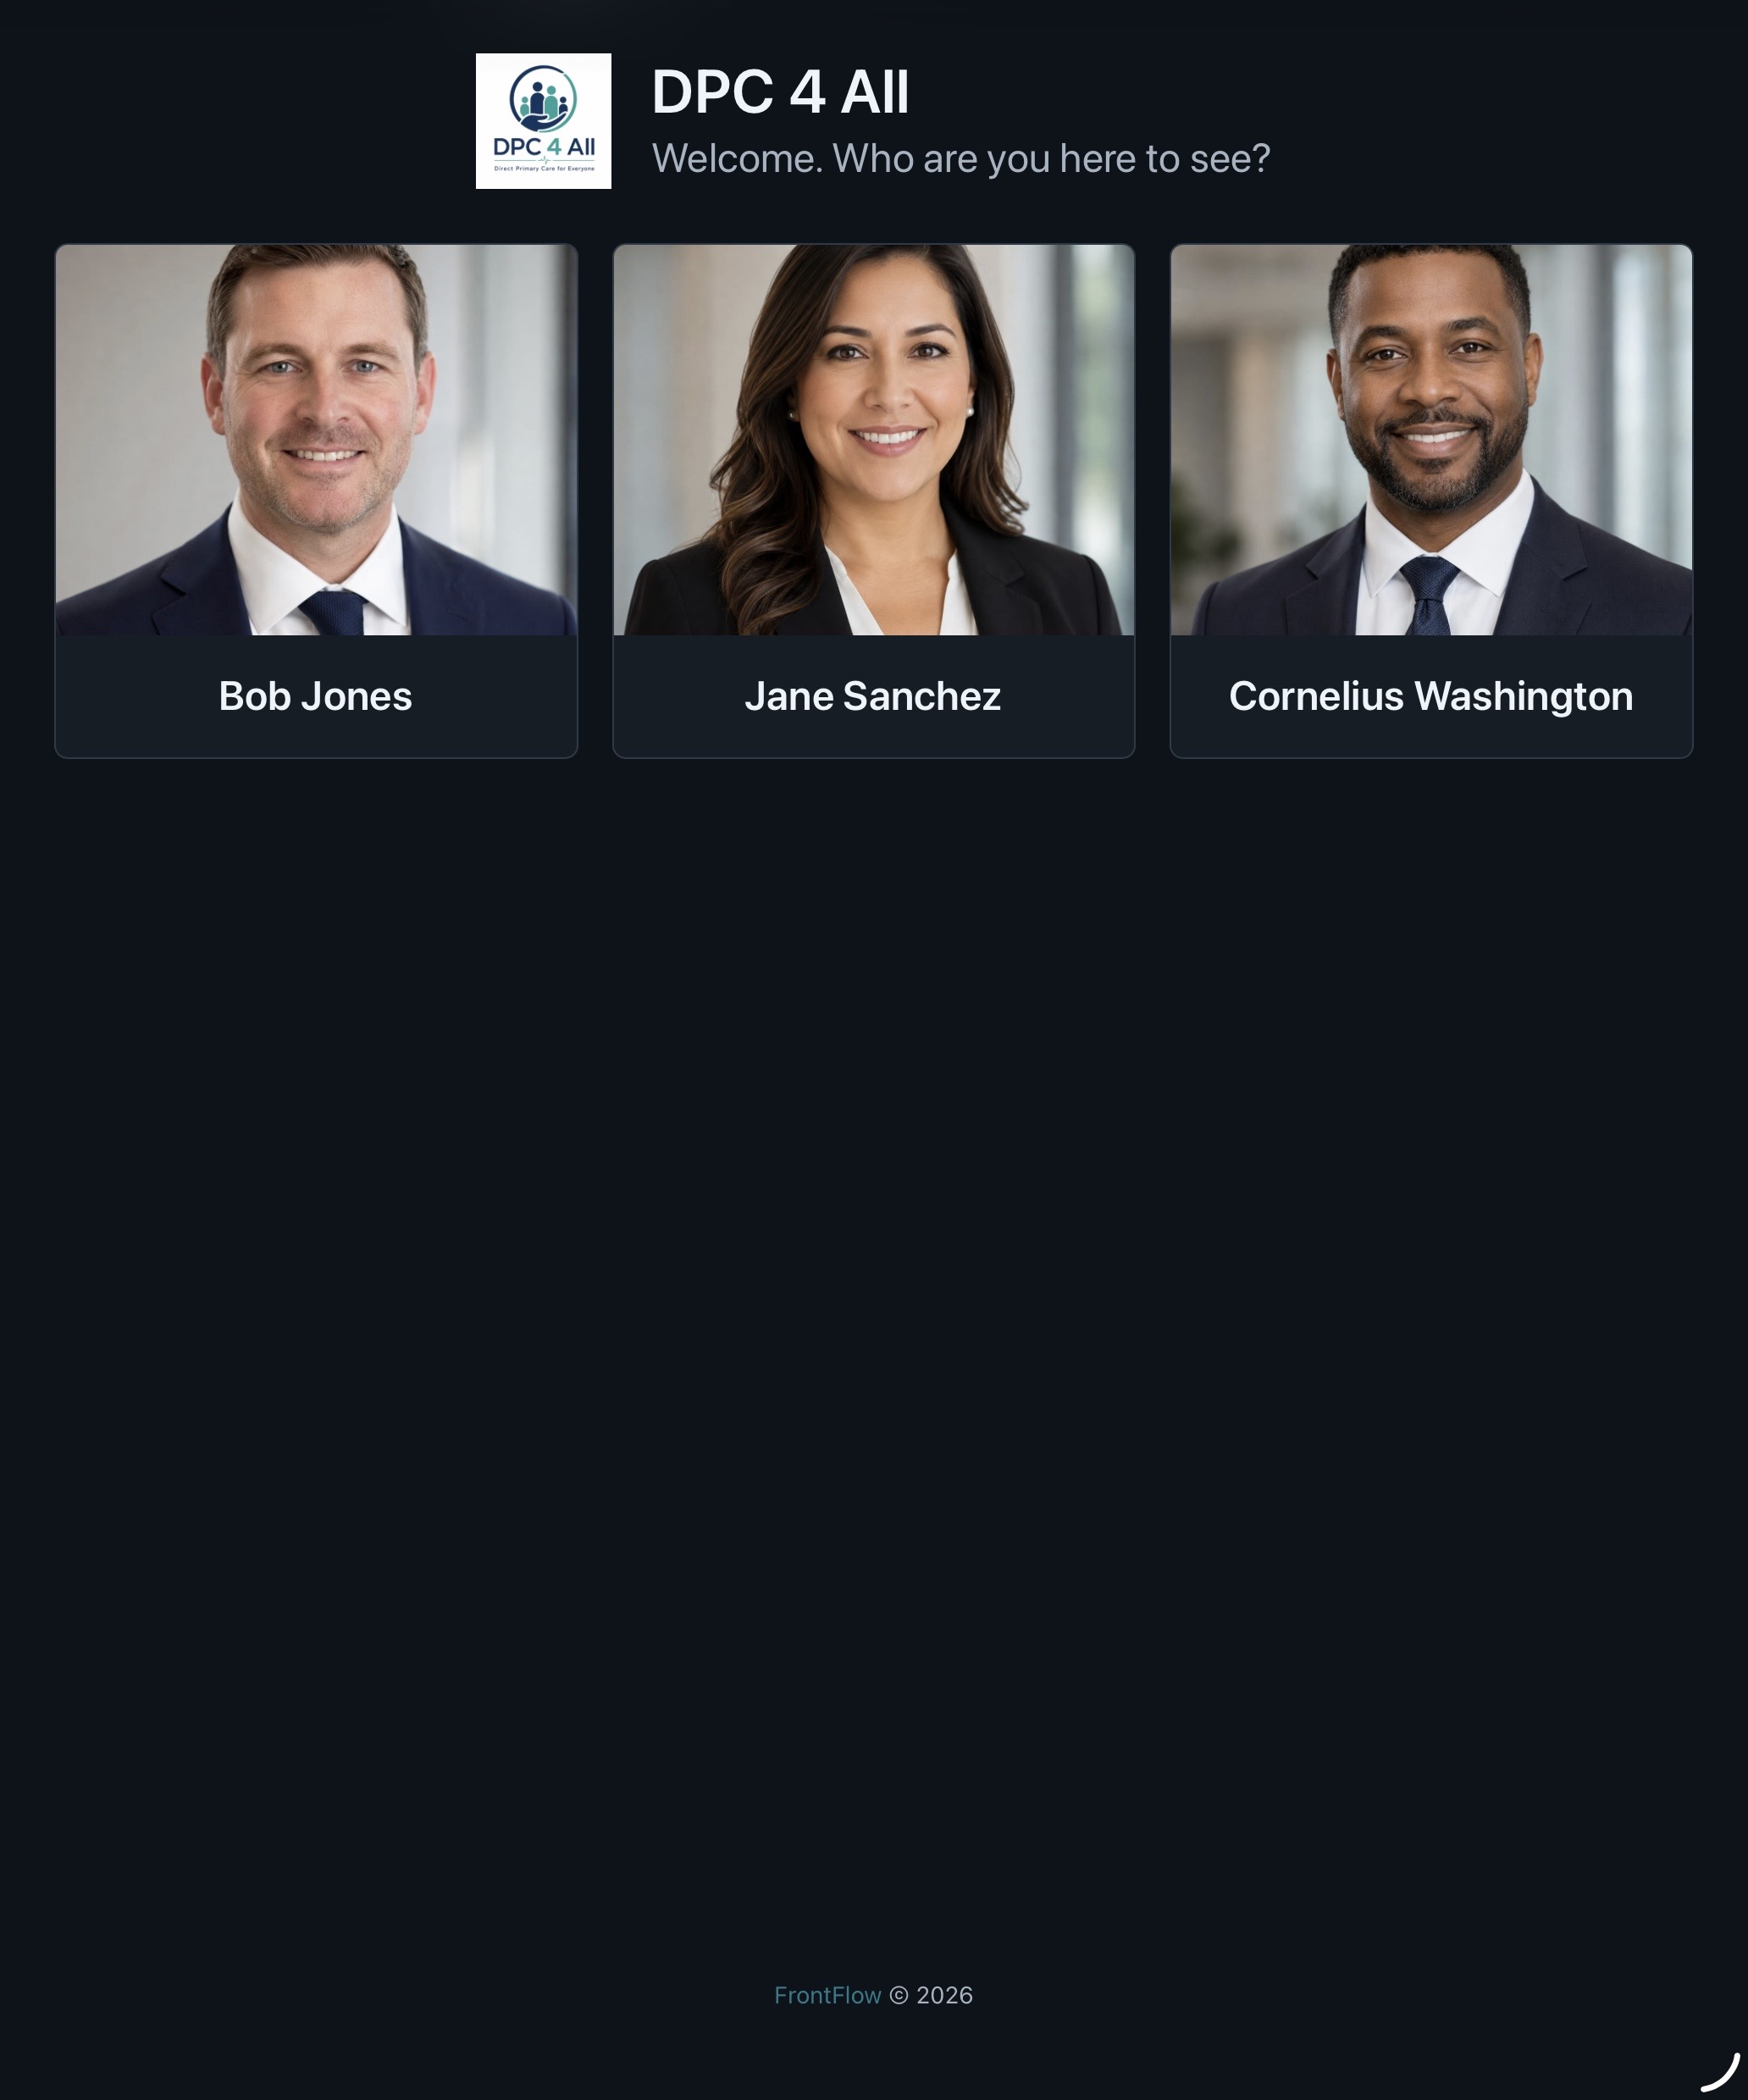
- Confirm that the kiosk shows:
- The uploaded company logo
- The company name, if enabled
- The welcome message
- Active, available employees/providers with their photos
- Confirm that inactive employees/providers and those marked out of office for the current day are not offered to visitors.

8. Test the visitor check-in flow
Run one complete test before placing the kiosk into service:
- Select an employee/provider from the kiosk.
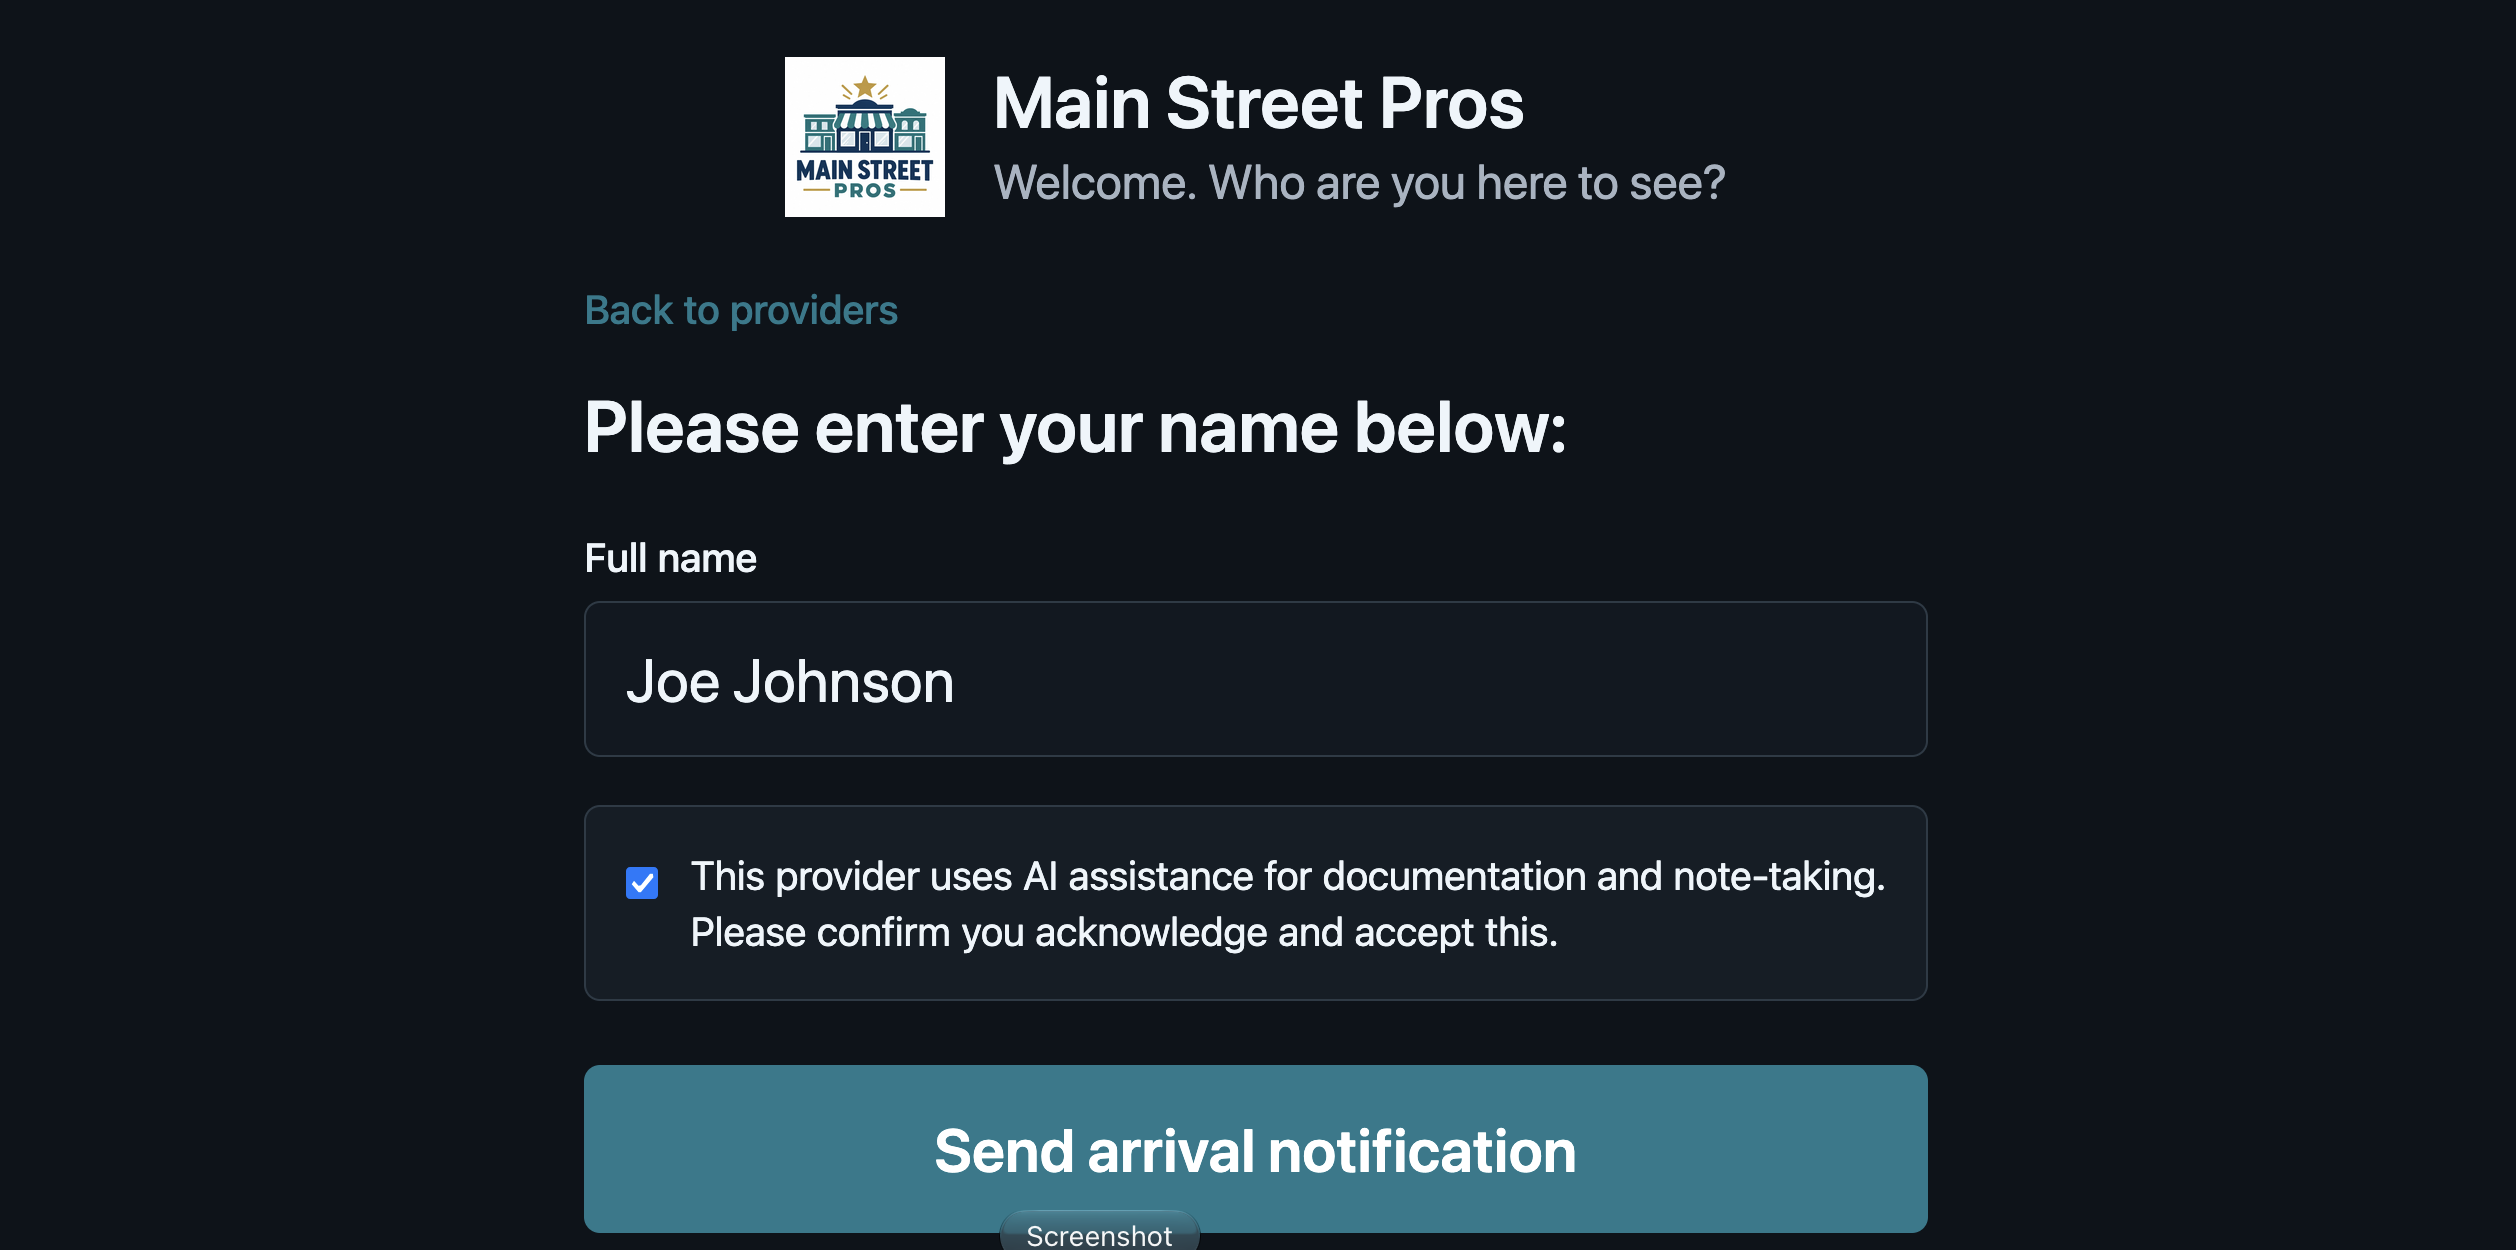
- Confirm the Please enter your name below: screen appears.
- Enter a test visitor name in Full name.
- If consent is required, read the displayed consent message and select its acknowledgment checkbox.
- Select Send arrival notification.
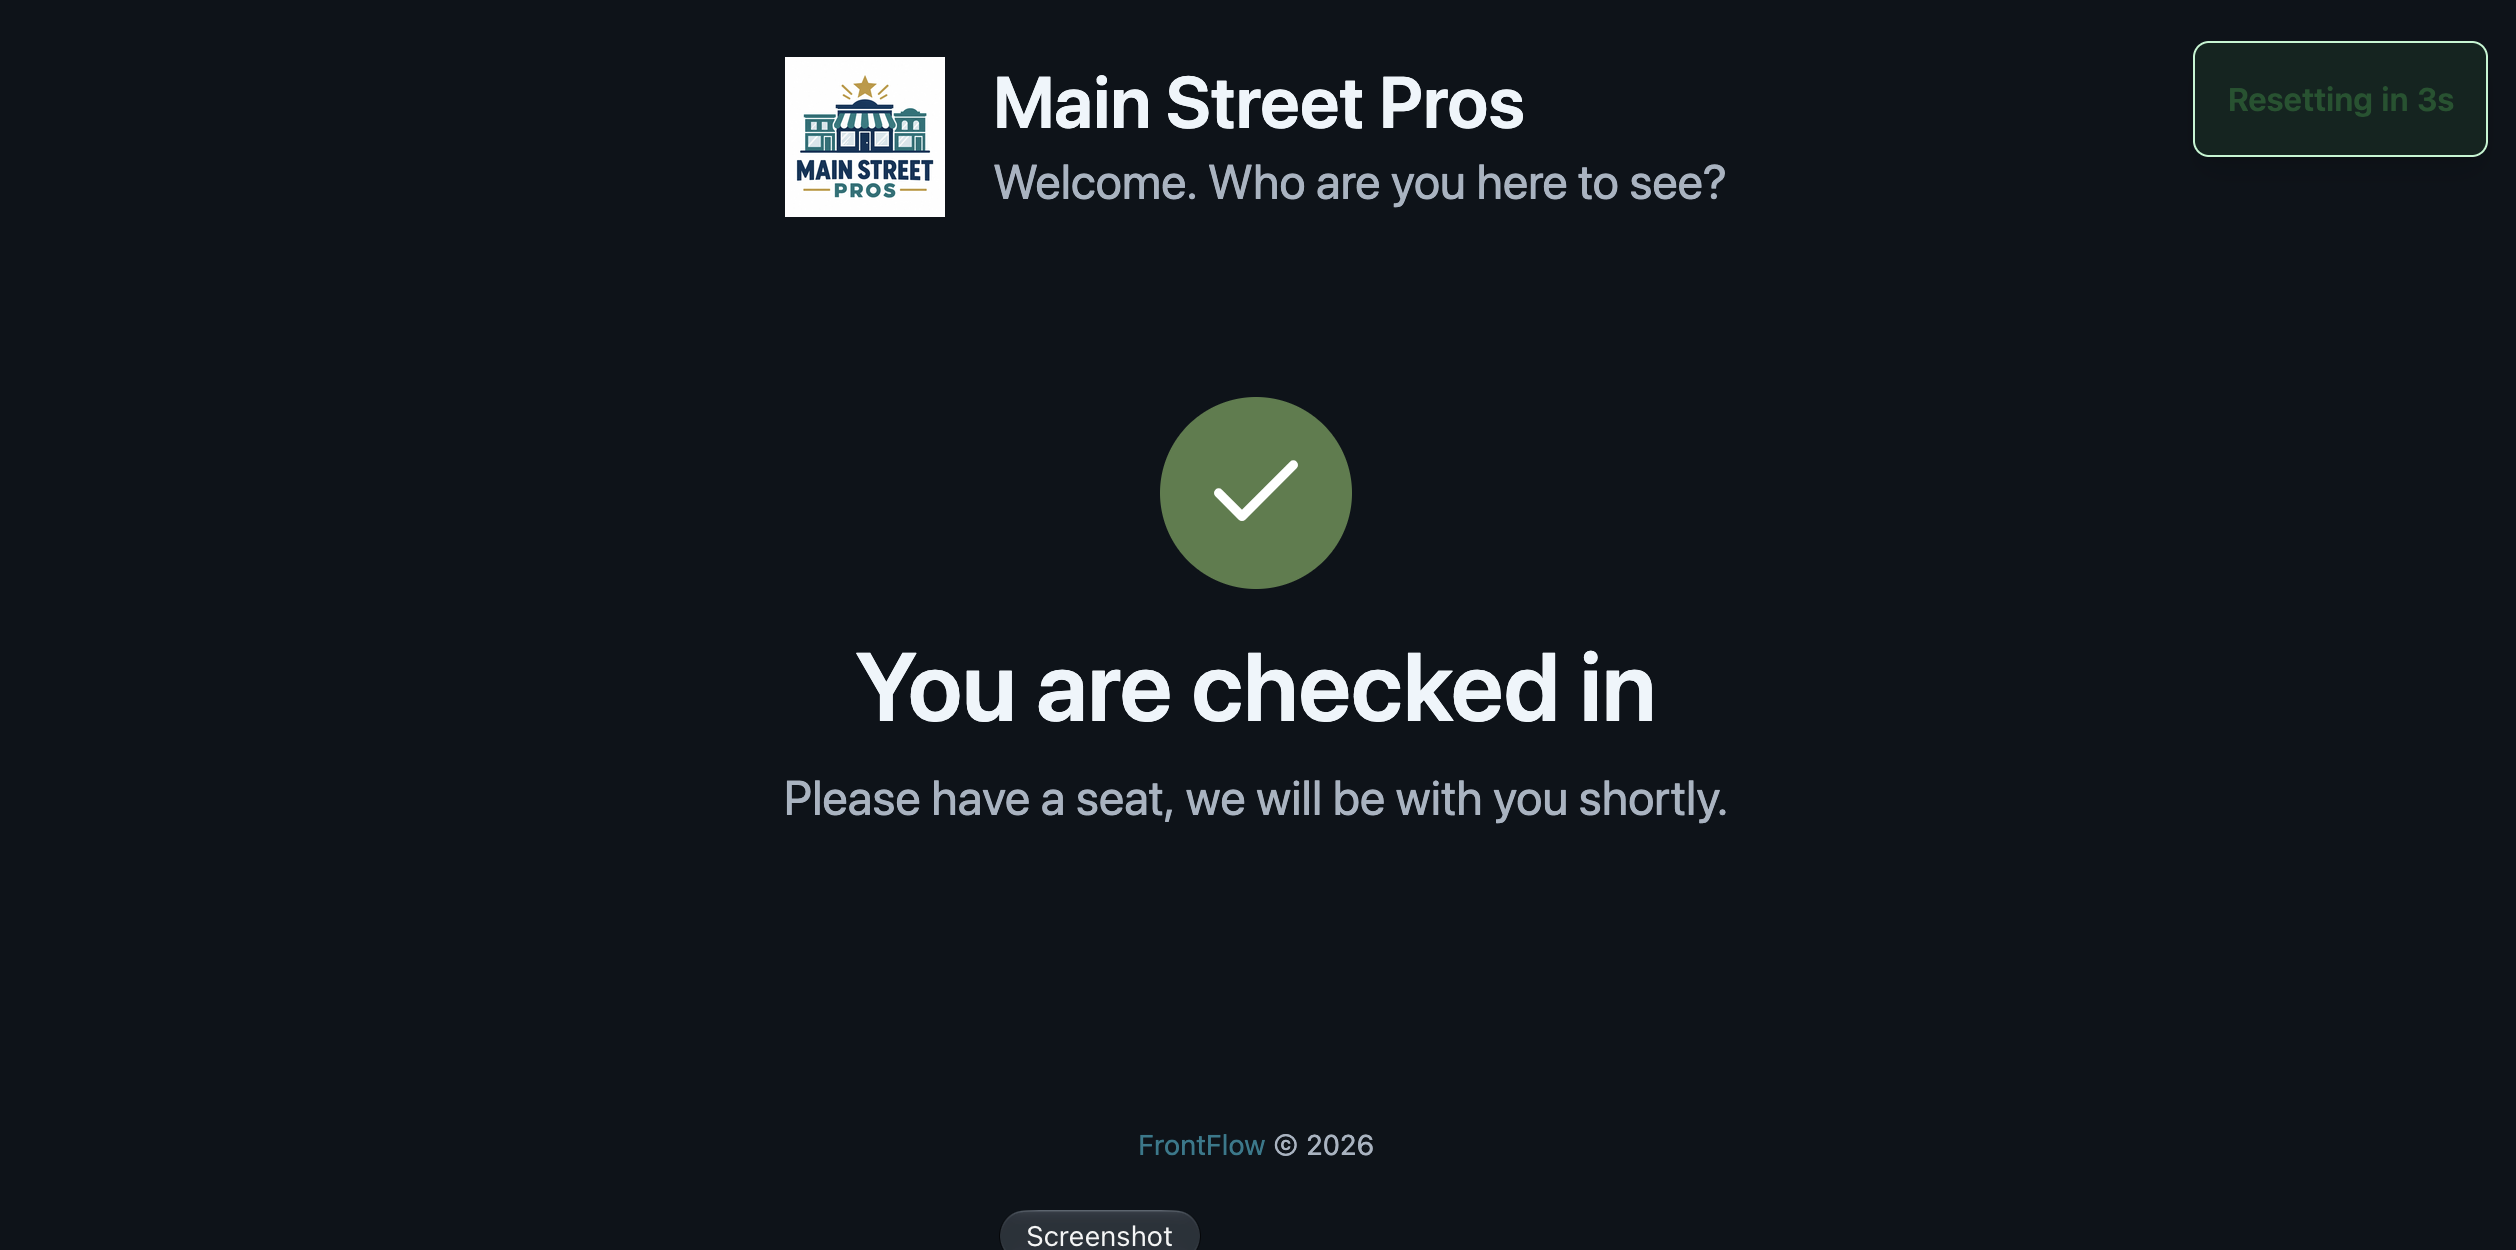
- Confirm that the kiosk reports a successful check-in.
- Ask the selected employee/provider to confirm that the arrival SMS was received.
- Return to the admin page and open Check-in Log with Display log to confirm the test entry is recorded.
9. Secure the administrator account
Use the Account Security section at the bottom of the admin page to protect the administrator account.
- Select Register TOTP to connect an authenticator app for stronger sign-in protection.
- Store any recovery information securely.
- If a password change is needed, enter Current password, New password, and Confirm new password, then select Change password.
Use a unique password of at least eight characters. A longer password or passphrase is preferable.
Final setup checklist
- Site URL name is correct
- Company name and time zone are correct
- Welcome message is correct
- Logo displays properly
- Kiosk unlock code is configured if required
- Every displayed employee/provider is active and has the correct photo
- Employee/provider SMS authorization was obtained before saving each mobile number
- Mobile numbers and consent-confirmation records are correct
- Visitor-consent settings and wording are correct
- Weekly out-of-office days are correct
- Kiosk shows the expected employees/providers
- A complete visitor check-in test succeeds
- The employee/provider receives the test SMS
- The test appears in the Check-in Log
- Administrator TOTP is registered